How To Design A Screen Printing Gallery That Will Impress Your Customers

Screen printing is a process that can be used to create beautiful designs on fabric. If you are looking to create a screen printing design gallery that will impress your customers, there are a few things you need to keep in mind. This article will discuss the most important factors to consider when designing a screen printing gallery. We will also provide some helpful tips for creating beautiful and eye-catching prints!

Have A Clear Plan.

Before you start creating designs for your screen printing design gallery, having a clear plan is crucial. Think about the overall aesthetic you are going for with your prints and what type of designs will fit that aesthetic best. You should also create a timeline and stick to it so that you don’t waste time on unnecessary details or take too long on one design element.

Choose Your Materials Wisely.

The materials you use in screen printing can make or break the success of your design gallery. You want to choose high-quality fabrics with vibrant colors that won’t fade over time. When selecting dyes, pigments, and other elements for your prints, consider how they will interact with each other and the fabric you’re printing on. Also, ensure that all your materials are safe to use and won’t harm the environment or the wearer.

Know Your Customers.

Before you begin creating designs for your screen-printing gallery, take some time to get to know your customers. What kind of people will be wearing these prints? Consider their age range, gender identity, style preferences, hobbies, and more. This research can help inform the type of designs you create so that they match your customer base perfectly. It’s also important to keep an eye on current trends in fashion so that you can stay ahead of the game with your design choices.

Choose a Color Palette and Theme.

Once you understand your customer base, it’s time to decide on a color palette and theme. You should stick with colors that can be screen-printed easily, such as black, white, reds, blues, and greens. However, don’t be afraid to experiment with other colors if you think they will be popular with your customer base. Also, choose a theme for your gallery that reflects your brand’s personality and resonates with customers. This could include vintage prints or humorous designs, depending on the type of audience you are targeting.

To conclude, choose a theme and color palette that will appeal to your customer base. This is important for creating the right atmosphere in your gallery and ensuring an enjoyable experience for visitors.

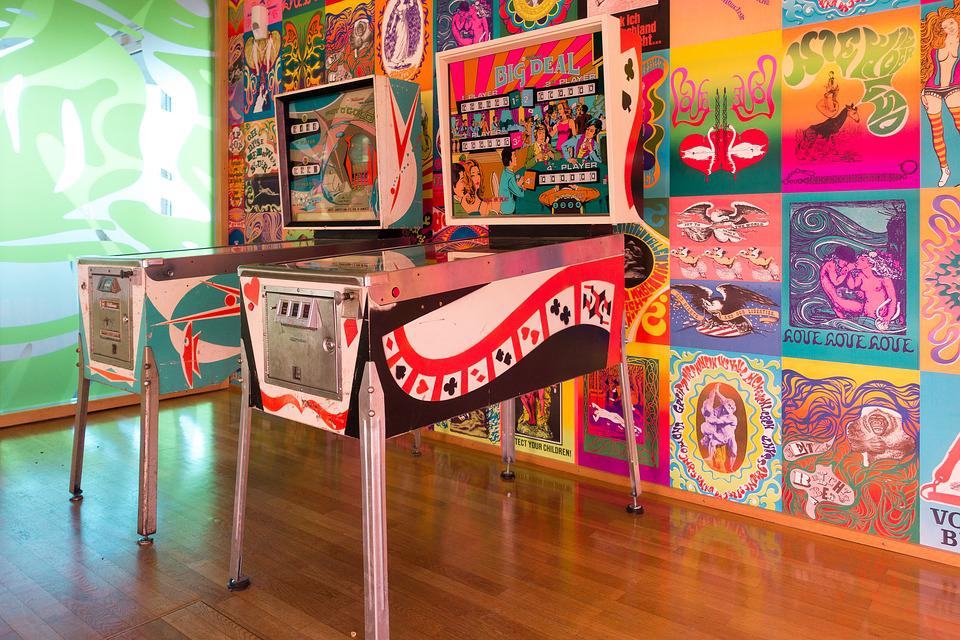
Screen Printing Design Gallery: A Collection Of Beautiful Prints

If you’re in the market for some new screen printing designs, or you’re just curious about what’s possible with this versatile printing technique, then you’ll want to check out this screen printing design gallery.

Here we’ve collected some of the most beautiful and eye-catching screen prints from around the web. Whether you’re looking for inspiration for your next project or simply want to see what’s possible with screen printing, we think you’ll find something to love in this gallery.

This is a printing technique that involves passing ink through a screen onto the desired surface. This type of printing is often used for t-shirts, posters, and other items.

The key to great printing is in the design. A well-designed screenprint will look amazing and really stand out from the crowd. That’s why we’ve collected some of the best screen prints around for you to enjoy in this gallery. We hope you find something that inspires you.

How do these galleries work?

These types of galleries are a great way to see what’s possible with this type of printing. You can find inspiration for your own prints, or just enjoy the beauty of these designs.

Most of these galleries will feature a variety of designs, all of which are created using the same printing technique. This means that each design is unique and has its own special look.

When you’re looking at a screenprint gallery, you’ll usually see the name of the artist or designer who created the piece. This is a great way to find new artists to follow or to get in touch with someone whose work you admire.

If you’re interested in purchasing any of the prints featured in a screen print gallery, be sure to contact the artist directly.

How can I find a good gallery?

There are a few ways to find these galleries online. One way is to search for “screen printing design gallery” in your favorite search engine.

Another way is to look for forums and groups on social media sites like Facebook and Instagram. These can be great places to find screen print galleries, as well as to connect with other screen printers.

What makes a good screen print design?

This is a question that doesn’t have one definitive answer. In general, good screen prints are those that are well-designed and executed. They often have a strong concept behind them and are usually simple and clean in their execution.

In conclusion, these galleries can be a great source of inspiration for your own projects. By looking at the work of other screen printers, you can get an idea of what is possible and start to develop your own style.

For more information on screen printing design gallery, check online.

Clarice Cliff: An Artist For All Time

Born in 1899, Clarice Cliff is widely considered to be the foremost ceramic pottery artist in the world. Cliff grew up in the English town of Tunstall, Stoke-on-Trent. Her beginnings were modest; she was one of seven children and both parents worked. Her father, Henry Thomas Cliff, was employed at a local iron foundry while her mother, Ann, took in washing to make ends meet. Cliff attended a different school than her siblings, which may have contributed to her sense of independence and unusual path of career woman. Perhaps more providential, Cliff routinely visited an aunt, an accomplished hand painter, who lived nearby her school.

At the age of 13, Clarice Cliff landed her first job in the pottery industry working as a gilder, meaning she added gold lines on traditional pottery ware. After mastering gilding, she decided to change jobs in order to learn freehand painting at another pottery factory while studying sculpture and art in her off hours at the Burslem School of Art. While most girls and young women were content to master only one or two essential pottery-making skills in order to maximize their income, Cliff was ambitious and passionate about her craft and was anxious to learn all she could about it. It is with this objective in mind that in 1916 Cliff decided to move to the pottery factory of A.J. Wilkinson at Newport, Burslem.

At A.J. Wilkinson, Clarice Cliff was granted apprenticeships due to coming to the favorable attention of one of the owners of the factory, Colley Shorter, a man 17 years her senior. Shorter would reportedly become her lover and, eventually, her husband. Under his protection and nurturance, Cliff mastered the skills of modelling vases and figurines, hand painting, enameling, and how to keep pattern books. These skills would prove essential to her later becoming a tour de force in the field of ceramic arts.

In 1927, Cliff’s hard work and dedication were recognized when she was given her own studio and even credited for the unique shapes and patterns she designed. While initially she only had a few artists working for her, it was only a matter of a couple of years before Cliff was running her own ceramic pottery factory. After several years of creating her own designs and style, notably Art Deco, Cliff was appointed Art Director at A.J. Wilkinson.

Cliff eventually married Colley Shorter but after Shorter’s death in 1963, Cliff sold the factory and retired. In 1972, Cliff died suddenly at the home she had shared with her mentor and husband. In 1976, admirers of Cliff’s work, Peter Wentworth-Sheilds and Kay Johnson, published a book about her and opened an exhibit of her work. This arguably sparked a revival of interest in her work that continues to this day.

Top Tips For Embroidery Beginners

Embroidery is a relaxing thing to do; you sit back and focus on a square inch of cloth and thread. It all comes down to the thread, cloth and you. After a few hours, you end up with a clear mind and a one-of-a-kind masterpiece. But there are times when your hard work results in missed stitches, pulled seams and even a mismatched piece that just does not look right. This happens when you have not followed simple embroidery rules. If you are new to the game, here is what you must do before starting out on this wonderful hobby.

Get the right supplies: Depending on the project, get the right fabric for your project. Most project instructions will itemize the fabric type, size and thread type required for the project. If no instructions are provided, choose a light quilting cotton. Embroidery thread is usually standardized and color-fast. Avoid floss or specialized threads as they will be difficult to use for beginners. Don’t forget to get an embroidery hoop as well. A basic 6-inch hoop will work the best. Needles are obviously a must and most needles can be used for embroidery Perth. Choose a pack with different eye sizes and store them carefully. If possible, get a thread conditioner as well. This accessory will coat the thread and protect it from fading or ripping over time. Other accessories include a water-soluble marker, sharp scissors, thimbles, and water soluble glue.

Pattern transfer: Water soluble markers are the best way to transfer images on to cloth. Trace the design on to the cloth and start your project. This method usually is good for lightweight fabric. You can also use fabric or tailors chalk to transfer the patter. For thicker fabric, iron-on patterns and printable stabilizers are a great option. Just print the design from your computer onto special paper and iron on or stick it on your fabric.
Start small: Embroidery takes time. Start with the smallest pattern possible and the simplest stitches. Take the time to learn more techniques and progress to harder projects as you go along.
Finishing: If you are going to frame your work or wear it, finishing is important. Trim the excess fabric or glue it under. Ensure that excess threads or knots are tucked under other stitches. You can always use stronger fabric or cardboard as a backing or frame your work to ensure stability.

Ready to learn more? Start with simple designs and then move on to complicated complex patterns. Check out our informative articles on embroidery at Embroidery Perth. We usually have articles out every week and you can also write in to us with queries.